Thursday, August 31, 2017

Guyanese Beef Short Rib Curry: Rich & Aromatic


Inspired by the fabulous curried beef short ribs served at the Keating Channel Pub & Grill, I always look forward to try and reproduce this dish, so exquisitely prepared by Chef Balan Balavijith. I started my investigation by exploring Guyanese curry recipes, and came across a number which featured either goat or chicken, but no short ribs. Not one to give up easily, I simply adapted those recipes and used beef short ribs instead. And I'm so glad I did because this Beef Short Rib Curry was absolutely delicious. The short ribs are enormously tender, and the sauce is delicately flavoured, velvety smooth and richly aromatic. Served with warm naan, rotis or rice ensures that this luscious can be enjoyed to the very last drop.


Guyanese Beef Short Rib Curry 
Serves 4-6

Seasoning:
1 medium onion, chopped
1 head of garlic cloves, peeled
leaves of a few sprigs of fresh thyme
desired amount of sambal oeelk chili sauce
1/4 cup water

Curry:
4 lbs beef short ribs
2 tbsp seasoning (for short ribs)
4 tbsp seasoning (for curry-masala paste)
4 tbsp garam masala
3 tbsp curry powder, such as Bolst's
1/2 tsp ground cumin
1/2 tsp allspice
1 tsp turmeric
1/3 cup boiling water 
6 tbsp canola or vegetable oil
2 tsp salt, or to taste
3 cups boiling water
1 tbsp tomato paste


In a blender, combine the onion, garlic, thyme leaves, pepper, and 1/4 cup water and process until smooth and thick, almost like a smoothie. Cut the beef short ribs into 3-inch pieces and pat dry with paper towel then set aside in a large bowl. Add 2 tablespoons of the seasoning to the short ribs and massage it into the meat. Let rest for 1/2 hour.

In a small bowl, mix the remaining seasoning, garam masala, curry powder, cumin, allspice, turmeric, tomato paste and 1/3 cup water into a thick paste. Heat a medium sized pot with the vegetable oil over medium-high and when the oil starts to shimmer, add the paste and fry for 1-2 minutes, stirring constantly until the mixture looks darker and not watery. Add the beef short ribs and stir to coat with the paste. Cook the meat for a minute or so in the fragrant mixture. Season with salt, to taste.

Add 3 cups of water, or enough to cover the meat, and bring to a boil; then lower the heat to simmer, cover and cook for 2 to 2 1/2 hours, until the meat is tender. Towards the end, defat the broth if necessary by skimming the surface with a broad spoon. For a thicker gravy, remove the short ribs from the pot, set aside and keep warm, and set the sauce over medium-high and cook until it has reduced and thickened to your taste. Serve with rice or some warm naan.


Wednesday, August 30, 2017

Mixed Berries with Grand Marnier & Yogurt


Simple, healthy and delicious, fresh berries with a dollop of tick and creamy Greek Yogurt is a fast and easy dessert that with some walnuts, pecans and pumpkin seeds, also makes a nutritious breakfast. Berries are antioxidant and vitamin powerhouses with important phytochemicals that can cross the blood-brain barrier and enter the areas of brain responsible for learning and memory. Raspberries are also a rich source of Vitamin C and like blueberries, are super anti-aging foods in just about every category. Tossed with a splash of Grand Marnier and served with yogurt and a sprig of fresh basil, mixed berries become transformed into an elegant light and low fat berrylicious dessert, pretty enough to serve to company, and easy enough to throw together at the last minute. 


Mixed Berries with Grand Marnier & Greek Yogurt
Serves 2

8 Strawberries, washed and sliced in half
1 cup blueberries
1 cup raspberries
1 cup plain Greek yogurt
1 tbsp Grand Mariner, optional
Sprig of fresh basil or mint, for garnish


Place the berries in a large bowl and toss with some Grand Marnier. When ready to serve, spoon a dollop of Greek yogurt overtop and garnish with a sprig of fresh basil or mint.


Tuesday, August 29, 2017

Squid Ink Pasta with Prawns, Calamari & Arugula


The culinary planets were aligned. With fresh Argentinian sweet prawns and calamari from Diana's Seafood, a crop of fresh arugula and chives from our garden, hot house tomatoes from the St Lawrence Market and Spaghetti al Nero di Seppia from our last trip to Italy, our dinner was shaping up to be 'delizioso!' Having shelled the prawns and not wanting to waste their hidden goodness, I decided to sauté them in olive oil to gently to coax out all the lovely shellfish flavours and create an intense prawn oil that accentuated the sweetness of the prawns and infused the dish with exceptional flavour. In this recipe, the oil is sautéed with crushed red pepper flakes, minced garlic, green onions and chopped capers, and seasoned with salt and fresh cracked black pepper. Cooked in salted water until al dente, the squid ink pasta is added to the fragrant garlic-onion mixture and tossed with a little white wine, fresh arugula, basil, and a cup of pasta water. Finished with grilled prawns and calamari, the seafood is added to the pasta and gently rewarmed in the sauce. Garnished with roasted tomatoes, chopped chives, a drizzle of olive oil, and finished with lovely garden fresh chive blossoms, this Squid Ink Pasta with Prawns, Calamari & Arugula was sweet, delicate and full of fabulous flavours of the sea — and garden!


Squid Ink Pasta with Prawns, Calamari & Arugula
Serves 4

1 lb calamari with heads, cleaned
20 large Argentinian prawns, shelled and deveined (reserve the shells)
4 small hot house or Roma tomatoes, halved
8 oz Spaghetti al Nero di Seppia or other squid ink pasta
1/2 cup olive oil, divided, plus extra for drizzling
1/4 tsp crushed red pepper flakes
Kosher salt and black pepper
4 garlic cloves, finely chopped
4 spring onions, finely sliced
1 tbsp capers, minced
1 cup fresh wild arugula
1 handful fresh basil leaves
1/2 cup white wine
1 cup pasta water
2 tbsp fresh chopped chives


Preheat the oven to 400°F. Toss the tomatoes in a bowl with 1/4 cup of olive oil, salt and pepper, and toss to coat. Place the tomatoes, cut side up, on a foil-lined baking sheet and roast for 45 minutes, until the tomatoes are soft and lightly caramelized. 

Place the peeled and de-veined prawns in a small bowl and toss with a glug of olive oil to coat. In another bowl, place the whole calamari with heads cut off below the beak, and toss with a little olive oil. Cover both bowls with cling film and set aide until ready for grilling on an outdoor BBQ.

Heat 2 tablespoons of oil in a large frying pan over a high heat. Sauté the prawn shells until lightly browned and fragrant, about 5-6 minutes, then remove and discard. Add the crushed red pepper flakes and sauté for a minute, then add the garlic, spring onions and minced capers to the infused oil and season with salt and fresh cracked black pepper. Cook until the garlic is fragrant and the onions translucent, about 5-6 minutes. 

Meanwhile, place the prawns and calamari on a preheated outdoor grill and cook until they are just cooked through. On a cutting board, slice the calamari into 1/4-inch rings, then cover the seafood to keep warm.

Cook the linguine in lightly salted boiling water for about 8 minutes or until al dente. Drain, reserving 1 cup of the cooking liquid. Stir the the arugula, basil, wine and a splash of the reserved pasta cooking liquid to the pasta. Add the grilled prawns and calamari and toss gently to rewarm the seafood. Adjust the seasoning to taste, then divide the pasta between 4 warm serving bowls. Garnish with the roasted tomatoes, chopped chives and a drizzle of olive oil. I finished the dish with a garnish of fresh chive blossoms, as they were readily available from our garden.


Monday, August 28, 2017

Pork Tenderloin with Wild Mushroom Marsala Sauce


Low in fat, high in protein and a rich source of vitamins, this simple recipe transforms extra lean pork tenderloin into a luxurious dish, served with a full flavoured wild mushroom marsala sauce. Sliced into 1-inch thick medallions and seared in a non stick pan with a tablespoon of butter until golden brown, the pork is set aside briefly while the mushroom sauce is prepared in a matter of minutes. A handful of wild mushrooms are sautéed in a tablespoon of butter and half tablespoon of olive oil until they are soft and golden, then flavoured with some marsala wine and a little light cream to finish the sauce. The browned pork medallions are then returned to the mushroom marsala sauce and simmered until they are cooked through. Served in a large serving bowl with a flurry of chopped parsley, this dish is an easy, elegant and delicious meal, perfect for a mid-week dinner but also impressive enough for serving family and friends. 


Pork tenderloin sliced and lightly pounded then sautéed on both sides

Wild mushrooms sautéed in a little butter until soft and golden

Marsala wine, cream and chopped parsley are added to the combined mushrooms and pork medallions and warmed though


Pork Medallions with Wild Mushroom Marsala Sauce
Serves 2

1 pork tenderloin, cut into 1-inch thick medallions and lightly pounded
1/4 tsp coarse salt
1/4 tsp freshly ground black pepper
1/2 tbsp olive oil
2 tbsp unsalted butter
12 oz mixed oyster, cremini and shiitake mushrooms, thinly sliced
2 tbsp dry Marsala wine
2 tbsp heavy cream, optional
1/4 cup chopped fresh Italian parsley


Season the pork medallions on both sides with salt and pepper. Heat the oil and 1 tablespoon of butter in a large non-stick sauté pan over high heat. When the butter is melted and foaming, add half of the medallions and sear until they're nicely browned, about 2 to 3 minutes per side. The pork should be golden brown and slightly firm to the touch. Transfer to a plate and set aside.

Melt the remaining tablespoon of butter to the pan. Add the mushrooms, reduce the heat to medium-high and sauté until all of the liquid has evaporated and the mushrooms are golden, about 3 minutes. Season with 1/4 teaspoon of salt and add the marsala. Once the wine has almost completely evaporated, stir in the cream and parsley, return the pork and any accumulated juices to the pan, and cook, flipping the medallions once, until they're firm to the touch and still a little pink in the middle, about 3 to 4 minutes. 

To serve, place the medallions on a serving platter and spoon over the mushroom marsala sauce with a final garnish of chopped parsley for show. Nice served with some steamed broccoli or french green beans.


Friday, August 25, 2017

Grilled Tandoori Chicken Tikka


Tandoori Chicken, or Tandoori Murghi, is a classic Indian dish made with a vibrant and spicy marinade of yogurt, lemon juice, ginger, garlic, vegetable oil and a handful of warm fragrant spices including powdered cardamom, chill powder, turmeric, garam masala and my secret ingredient — Tandoori masala — which gives the marinade it's bright orange-red lustre. Combined into a loose paste and liberally coated over pieces of lightly scored bone-in chicken breasts, thighs or legs, the marinade works its magic over a couple of hours or overnight in the refrigerator, allowing the flavours to fully develop. The rich blend of spices gives the Tandoori Chicken its unique flavour, but more importantly, it's the yogurt that helps to penetrate the spices into the meat while tenderizing at the same time. This is also the basic marinade that is often used to cook the chicken before making Butter Chicken. Grilled on an outdoor barbecue over medium-high heat, the thick consistency of the yogurt keeps the seasonings on the meat and seals in the robust flavours, for a tender, moist and succulent dish that's simply the best.


Grilled Tandoori Chicken Tikka
Serves 2

2 chicken breasts, boneless and cut in half
1/2 tbsp fresh ginger, grated
1/2 tbsp fresh garlic, minced
1/4 tsp cardamom powder
1/2 tbsp chili powder
1 tbsp lemon juice
1 cup plain Greek yoghurt
1/2 tbsp vegetable oil
1/4 tsp garam masala
1 1/2 tbsp Tandoori masala
1 tsp turmeric
1 tsp salt


Pat dry the chicken breasts and score the tops with 3 or 4 cuts. In a large bowl, combine the yoghurt, ginger, garlic, cardamom, chili powder, garam masala, oil, lemon juice, Tandoori masala, salt and mix well to form a loose paste. Add the chicken breasts to the mixture, tossing thoroughly to ensure they're well coated. Cover and refrigerate for at least 2-3 hours, or even overnight, to allow the chicken to marinate.

To grill, place the chicken breasts on a pre-heated outdoor barbecue and cook 8-10 minutes over medium-high heat. Turn them over and continue cooking for an additional 10 minutes or until the chicken is evenly cooked and has nice grill marks. Serve with Gobi Matar and pappadams for a delicious low fat meal.


Thursday, August 24, 2017

Churrasqueira Martins: A Neighbourhood Gem


Owned and operated by Carlos and Samantha Martins since 1992, Churrasqueira Martins Grill House is a neighbourhood gem, tucked away in a lacklustre plaza near Rogers and Old Weston Road in Toronto. Famous for its fabulous fish and succulent Barbecue Chicken, Martins imports their fish twice a week from Portugal which arrives fresh on ice, never frozen, and serves quite possibly the city's best whole grilled fish and seafood in the city. Cooked to perfection and flavoured with love, the Grilled Octopus is the best in the city. Relaxed and informal with an outstanding menu of over 60 Portuguese classics and extensive wine list including their own wine brand of house red and white, Martins sensational cuisine is only matched by their warm, friendly and gracious staff, helpful with any menu recommendations and attentive to our every whim. 

Arriving for a weekday lunch on a rainy summer afternoon, we began with complimentary plates of Presunto, a traditional dry-cured ham from Portugal, as well as heaping bowls of spiced olives, as we enjoyed a bottle of Martins house white wine, followed with an assortment of appetizers including delicious Grilled Squid topped with parsley infused olive oil, and an impressive platter of gorgeous Grilled Tiger Shrimp. Entrées are equally delicious, such as Grilled Whole Sea Bream, Grilled Salted Cod served with roasted potatoes and seasonal vegetables, Martins famous slow-roasted Charcoal-BBQ Chicken served with a pot of chili-laced Piri-Piri sauce, an iconic blend of chili, lemon and oil, and for the carnivore at our table, a grilled AAA Strip Loin Steak topped with a fried egg served with french fries and rice. It's imperative to save room for Martin's Pastéis de Nata, Portugal's famous custard tarts which are served hot from the oven, as they are freshly baked per order. Open seven days a week, there is absolutely no place outside of Lisbon to find better grilled fish and seafood than Churrasqueira Martins. We have become so addicted to their sensational seafood and warm hospitality that, with our greatest restraint, we limit ourselves to only one visit per month, but this was our fifth time since June!


Warm and welcoming, Martins always puts a smile on our face as we walk into the restaurant

Martins leather bound menu features sensational fish, seafood and classic Portuguese dishes

Complimentary plates of Presunto, a traditional dry-cured ham from Portugal, 
arrive at the table as guests peruse the menu

A bowl of cured olives for the table to share

Adega de Pias white wine from the Monte da Cappella, the Alentejo region of Portugal

With a light straw colour, Martins house white is smooth and delicious

Gambas Grelhada - Grilled Tiger Shrimp

Lula Grelhada - Grilled Squid Topped with Parsley Infused Olive Oil

Feijao a Portuguesa - Portuguese Bean and Sausage Soup

Selection of fresh Portuguese bread

Bacalhau à Lagareiro - Grilled Salted Cod served with roasted potatoes and seasonal vegetables

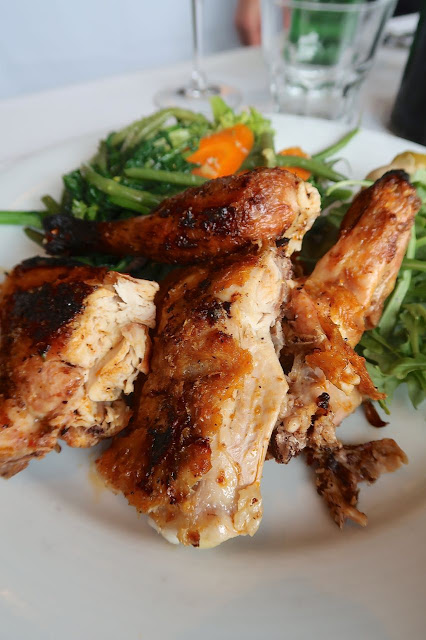
Slow-Roasted Charcoal-BBQ Half Chicken served with a pot of chili-laced Piri-Piri sauce, 
the iconic blend of chili, lemon and oil, and vegetables

Dorada Grelhada - Grilled Whole Sea Bream served with broccoli, carrots, broccolini and arugula

Bitoque - Grilled AAA Strip Loin Steak Topped with a Fried Egg Served with French Fries and Rice

Pastéis de Nata - Portuguese Custard Tart, hot and delicious, and freshly baked per order


Wednesday, August 23, 2017

Gravlax with Crème Fraîche, Capers and Dill


Salmon Gravlax is a perfect food. The Swedes have celebrated the tradition of making dill-cured salmon for the Christmas season for generations. Traditionally, the meal begins with fish, the most popular being 'Gravadlax': salmon cured in sugar, salt and dill. As far back as the Middle Ages, fishermen cured salmon by burying their specimens in the sand above the high tide level, and then waited for the fish to ferment. An ancient tradition, salting fish preserves it by drying it out and removing the moisture microorganisms need to thrive. Originally this practice insured that the catch would be safe from spoiling when boats were out to sea far from market. Today, a mix of salt, sugar, herbs, and spices serve to cold cure salmon and make a traditional smorgasbord plate.

Delicious prepared in advance as an elegant appetizer, it's also fabulous served with bagels and cream cheese or eggs benedict and creamy hollandaise. With just a few ingredients and very little effort, Gravlax can be made easily at home, and at a fraction of the cost of what it sells for in the shops. Simply remove the large bones from a 3 to 4 pound salmon fillet. Prepare the cure by combining the salt and sugar, and apply it evenly on the fillet. Add dill or any other herb or spice desired, wrap the fillet, place it under a weight, and refrigerate. There is about 20 minutes of work involved in preparing gravlax, then a waiting period of 24 hours. After removing the fillet from the refrigerator, wipe the salt cure from the salmon, and using a long thin knife, slice paper-thin slices from the fillet. Sensational served with a mustard sauce, which is French in origin, home cured gravlax makes a luxurious hors d'oeuvre for any special occasion.


Salmon Gravlax
Makes 20-30 appetizer portions

1 3-4 lb salmon filet, deboned with skin on
1/2 cup salt
1/2 cup granulated sugar
1 bunch fresh dill


On a work surface, cut the salmon in half into 2 filets and place them skin side down. Mix the salt and sugar together and spread half of the cure mix over the surface of one filet. Lay the dill on top, then spread the rest of the cure mix over the dill and lay the second side of salmon, skin side up, over the first — thick part of one filet over the thin part of the other — so together they make a flat 'sandwich'. 

Place the salmon in a rimmed glass dish large enough to hold the fish, and cover firmly with cling film. Put a dish on top and weigh it down with some heavy cans or weights. Refrigerate for 24-36 hours, during which time, juices will accumulate in the bottom of the dish and the salmon with cure.

Take the salmon from the wrapping, remove the dill and scrape off any excess mix. With a long sharp knife, carefully slice thin slivers of the pink salmon on the bias, and serve with some capers, sliced red onion, lemon wedges and Mustard Dill Sauce or Crème Fraîche. Heaven!


Tuesday, August 22, 2017

Caprese Salad with Tomatoes, Basil & Bocconcini


The ultimate summer salad, a classic Caprese Salad involves slicing hot house tomatoes and layering them between slices of perfectly ripe Buffalo Mozzarella, and garnishing with fresh basil leaves. By using small bite size bocconcini and mini red and yellow campari and cherry tomatoes tossed with some olive oil, sea salt and fresh basil, the classic flavours of this mediterranean Insalata Caprese is perfect for serving a large group of friends, as part of an al fresco lunch.


Caprese Salad with Tomatoes, Basil & Bocconcini
Serves 8

200 gram tub of mini Bocconcini, drained
2 pints mixed campari and cherry tomatoes: red and yellow
1 handful fresh basil, julienned and sprig for garnish
1 tbsp olive oil
Maldon sea salt and freshly ground pepper, to taste


Slice the campari and cherry tomatoes in half and place in a mixing bowl with the drained bocconcini. Season with olive oil, sea salt and some black pepper and toss to coat with the julienned basil. To serve, pour the mixture into a decorative bowl and garnish with a sprig of basil.


Monday, August 21, 2017

Spencer's at the Waterfront: Dining on Burlington Bay


Located on the Burlington lakefront, Spencer’s at the Waterfront offers lovely, panoramic views of Burlington Bay and Lake Ontario. Warm and welcoming with a natural wood and earth tone interior, diners can enjoy the sparkling lake view from inside Spencer's newly renovated dining room with floor-to-ceiling windows, or from the picturesque outdoor terrace, perfect for summer dining. Tucked away in the award-winning landmark building by Baird Sampson Neuert Architects, Spencer’s on the Waterfront has been a signature restaurant in downtown Burlington for the past decade. The property is well-known for its ship-shaped observatory encased with 30 foot, floor-to-ceiling windows that overlook Burlington’s parklands and waterfront. 

As part of the restaurant’s 10-year anniversary, Pearle Hospitality refreshed Spencer’s brand to focus on fresh seafood and a daily changing Market Board features everything from halibut from B.C. to pickerel from Ontario’s Great Lakes. Whatever the fishermen are catching, that’s what’s for dinner. The market board is also accompanied by a menu that features craft cut steak, chilled seafood and a great selection of appetizers and sharing plates, such as Fried Humboldt Squid with gochujang aïoli, East and West Coast Oysters and spectacular Deluxe Seafood Tower which at $125 amply serves 4-6 people. On the weekend, Spencer's serves it's famous Sunday Brunch with unlimited Mimosas, seafood, salads, pasta, cheese board, artisanal breads, roast beef, salmon and chef's station with Eggs Benedict and made-to-order omelettes. Water and sky: the serene and naturally romantic backdrop of Spencer's waterfront naturescape promises a dining experience that changes with the seasons.


Spencer's bartender mixing a Mint Julep

The newly renovated interior with a modern nautical theme by Toronto design firm Addax

Rosé Sangria

6 oz Beef Tenderloin brushed with red wine butter and served with potatoes and farm inspired vegetables

Brunch Mimosa

Spencer's Sunday Brunch with fresh east coast oysters, shrimp, snow crab and more


Canadian Seafood Bake 
Serves 4
Recipe courtesy of Spencers

2 large onions
2 tbsp old bay seasoning
16 small new potatoes
8 bottles of Mill Street Organic beer
2 andouille sausages
2 1 1/2 lb Canadian lobsters from Nova Scotia
12 medium sized Manila clams from BC
16 blue PEI mussels 
2 cobs of corn, cut in quarters
1 baguette
1/2 lb butter - half for cooking half for drawn butter


In a large stockpot, melt the butter over medium-high heat. Add chopped onion and old bay spice. Sweat onions until translucent, about 6 minutes. Add new potatoes and andouille sausage, stir to combine. Add Mill Street Organic beer or beer of your choice, and bring to a simmer. Once the beer is simmering, add the lobsters to pot and cover tightly with a lid for about 6 minutes. Remove the lid, add the clams followed by the mussels and corn. Cook until the clams and mussels are open, the remove the lobsters from pot, and crack the claws and tail. Serve in large deep platter with drawn butter and warm bread for guests to share.


Classic Mint Julep
Serves 4
Recipe courtesy of Spencers

8 oz Bulleit Bourbon
4 oz simple syrup
12-16 mint leaves
Crushed ice


Tear and place mint leaves in the bottom of 4 chilled julep glasses. Add the bourbon and simple syrup then fill the glasses about 1/3 full with crushed ice and stir slowly. Fill the glass with ice until it comes over the rim, resembling a snow cone. The glass will become frosty. Garnish with a mint sprigs.


Friday, August 18, 2017

Raspberry, Plum & Blueberry Tart with Streusel


This gorgeous Raspberry, Plum & Blueberry Streusel Tart is a cross between a tart and a clafoutis, and is absolutely delicious. The sweet butter crust is made with ground almonds, flour, white and brown sugar, cinnamon, a little salt and butter, which are all blended together in a standing mixer fitted with a paddle attachment. The resulting crumble is pressed into the base and up the sides of a greased springform pan, then baked for about 20-25 minutes. Once the crust has cooled, chopped pitted plums, raspberries and blueberries are scattered along the bottom, although any combination of stone fruit and berries would be great. A simple custard of eggs, cream, flour, cinnamon and nutmeg is then whisked together and poured over the fruit. The remaining streusel is sprinkled over the fruit and the whole tart is baked at 350°F for 45-50 minutes, until the custard is set and the crust is golden brown. The crisp buttery almond crust is extraordinary — a crunchy cookie-like sweet shortbread — which compliments the tart fruit and creamy clafoutis-style custard beautifully. A fabulous dessert, this Raspberry, Plum & Blueberry Streusel Tart is a real winner.


Raspberry, Plum & Blueberry Tart with Streusel Topping
Serves 6-8

3/4 cup unsalted butter - 1 1/2 sticks - chilled and cut into small pieces
1/3 cup blanched almonds 
1 3/4 cups all-purpose flour, divided plus 1 tbsp
3/4 cup plus 2 tbsp granulated sugar 
1/3 cup packed light brown sugar 
3/4 tsp ground cinnamon 
3/4 tsp salt 
4 medium ripe but firm plums
1 cup raspberries
1 cup blueberries 
2 large eggs, lightly beaten 
1 large egg yolk 
2/3 cup light cream 
1 tsp grated nutmeg


Heat oven to 350°F. Grease a 9-inch springform pan with room temperature butter or olivina and set aside. Place the ground almonds in a food processor and pulse until medium fine. 

Transfer the nuts to the bowl of an electric mixer fitted with a paddle attachment. Add 1 1/2 cups flour, 1/2 cup granulated sugar, 1/3 cup light brown sugar, 1/2 teaspoon cinnamon, and 1/2 teaspoon salt; mix until just combined. Add butter, and mix on low speed until the crumble begins to stick together, about 2 to 3 minutes. Press 3 to 3 1/2 cups of the crumble into the bottom of the prepared pan and to about 1 1/2 inches up the sides of the pan to form the crust. Set the remaining crumb mixture aside.

Transfer the crust to the oven and bake until it appears to be set, about 20 to 25 minutes, then set aside. Watch to ensure the crust doesn't burn.

Slice the plums in half, remove pits and slice into eighths. Scatter the raspberries, blueberries and sliced plums onto the cooled crust and set aside.

In a medium bowl, whisk together the remaining 1/4 cup flour + 1 tablespoon flour, plus 2 tablespoons granulated sugar. Whisk in the 2 eggs, egg yolk, cream, 1/4 teaspoon cinnamon, 1/4 teaspoon salt and nutmeg, and mix until blended. Pour the custard over the fruit and sprinkle with remaining crumb mixture. Transfer the tart to the oven and bake until the custard has set and is slightly golden, 45 to 50 minutes. Let rest at least 25 minutes before cutting. Serve warm or at room temperature with a bowl of whipped cream, Greek yogurt or vanilla ice cream to be completely decadent.


Thursday, August 17, 2017

Gobi Matar: Indian Cauliflower, Peas & Kari Leaves


A staple in most Indian restaurants, Aloo Gobi is an aromatic combination of spiced potato (aloo) and cauliflower (gobi), made even more popular with Gurinder Chadha's 2002 film Bend It Like Beckham, a wonderful heart-warming comedy about bending the rules to reach your goal. The film follows two 18 year old girls who have their heart set on a future in professional soccer, as opposed to finding a nice Indian boyfriend, settling down and cooking the perfect chapatti. There is a quirky cooking segment at the end of the film where the director of the film, Gurinder Chadha, makes her personal recipe for Aloo Gobi with the help of her outrageously interfering mother and auntie. Ever since I saw that segment, I can never make this dish without smiling. With its rich texture, complex flavours and intoxicating aroma, Gurinder's recipe for Aloo Gobi has been adjusted without potatoes for a sensational Gobi Matar, an equally delicious yet low-fat carb-free version of the original.


Gobi Matar - Indian Cauliflower & Peas
Serves 2-4 

1/2 cauliflower 
1/4 cup vegetable oil 
1/8 tsp asafoetida 
1 tbsp black mustard seeds 
1 tbsp kari leaves 
1 cup peas, fresh or frozen 
1/2 tsp turmeric 
1/4 tsp salt, or to taste 
1 tbsp chopped herbs for garnish, optional


Separate the cauliflower into small florets, about 1 to 2-inches. Warm the vegetable oil in a large sauté pan over medium heat. When hot, add the asafoetida, then a second later, add the mustard seeds. When the mustard seeds begin to pop, add the kari leaves and stir to combine. Then add the cauliflower, turmeric and some salt to taste. Cook for 5 or 6 minutes, stirring occasionally to ensure the cauliflower is well coated with the spices and begins to brown slightly. Add 1/2 cup of water, and as soon as it starts to bubble, add the peas, cover the pan and turn down the heat to med-low. Cook 10-15 minutes more until the cauliflower is soft and cooked through. Sprinkle with some chives or cilantro leaves and serve.