Thursday, March 31, 2016

Crispy Salmon on Spinach Mash & Braised Succotash


There is nothing quite like gorgeous pieces of salmon cooked to crispy perfection. Served over a pillow of creamy mashed potatoes tossed with chopped spinach, butter and skim milk nestled on top of a bed of colourful braised vegetables, this dish is a symphony of flavours and textures. The key to mastering the classic pan-searing method of making restaurant-quality crispy-skinned salmon is simple and straight forward. To begin, pat paper towels over all sides of each filet. The salmon should be as dry as possible — the dryer the fish, the better it will cook. Using a neutral oil such as grapeseed or canola, a nonstick frying pan is set over medium-high heat. While the pan heats, each piece of salmon is generously seasoned with salt and pepper, and when the oil is shimmering, each fillet is laid skin-side down into the pan and immediately press down gently on the fillet and turn the heat down to medium-low. Pressing on the fish helps keep the skin in contact with the pan and ensures an evenly-crisped surface. Salmon skin shrinks as it cooks, so if the fish isn't pressed into the pan, it can curl out of shape. Don't move the fish in the pan until a crust has formed. You'll know when a crust has formed and your fish is ready to flip by shaking your pan and the fish slides across the pan. Once the skin is crispy, flip the salmon over and 'kiss' the top of the fillet just long enough to finish cooking it, which should be about only about a minute for medium-rare succulent pink perfection. 


Mashed potatoes with chopped fresh spinach, butter, skim milk and seasoned with salt and white pepper

Red cherry and grape tomatoes sautéed in oil and thyme

Diced zucchini and corn added to the tomatoes and simmered over medium low for 10-15 minutes

While the succotash is cooking, the salmon is set skin side down in a non stick frying pan 
with a little oil until the skin is crisp, about 10 minutes

Once the salmon is cooked about half way through and the skin is crisp, 
the salmon is turned over and cooked another minute or two until done


Crispy Salmon on Spinach Mash with Braised Succotash
Serves 2

2 skin-on salmon fillets, patted dry
1 pinch salt
1 pinch fresh ground white pepper
4 tsp vegetable oil

Spinach Mash:
2 russet potatoes, peeled and cut in chunks
1/4 cup warm milk
1 tbsp butter
1/4 tsp salt
1/8 tsp pepper
2 cups packed fresh spinach, thickly sliced

Braised Vegetables:
1 tbsp extra-virgin olive oil
1 cup cherry or grape tomatoes
2 tsp chopped fresh thyme
1/4 tsp fish ground white or black pepper
1/4 tsp salt
1 cup fresh corn kernels or frozen corn kernels
1 zucchini, diced


In a large saucepan, cook the potatoes in boiling salted water until tender, about 18 to 20 minutes. Drain well then add milk, butter, salt, pepper and mash until smooth. Stir in the spinach, then cover and keep warm.

Meanwhile, in a large frying pan, heat the oil over medium heat. Add the tomatoes, thyme, pepper, salt and cook, stirring occasionally until the sauce has thickened, about 10 minutes. Add the corn and zucchini and cook, stirring occasionally, until the vegetables are tender-crisp, about 5 minutes.

Meanwhile, sprinkle the flesh side of the salmon with salt and pepper. In a large nonstick frying pan, heat a tablespoon of oil over medium low hight, and set the salmon skin side down. Using a spatula, press down on the fish to ensure all the skin is touching the pan, then turn the heat down to medium low and continue cooking the fis  until the skin is crisp and releases easily from pan, about 10 minutes or until the salmon is 90% cooked. Turn and cook until the fish flakes easily when tested with a fork, about 1 to 2 minutes.

To serve, spoon the mashed potatoes into the centre of 2 shallow pre-warmed bowls and surround with the braised vegetables. Top each bowl with the salmon set skin side up and serve immediately.


Wednesday, March 30, 2016

Classic Oven Roasted Vegetable Ratatouille


Ratatouille is one of the great Mediterranean dishes, perfuming the kitchen with the essence of Provençal cuisine and all the glorious colours of autumn. Made with diced eggplant, zucchini, peppers, and tomatoes, this delicious Ratatouille is prepared by oven roasting the vegetables on a parchment lined baking sheet, which allows them to retain their own shape, texture and character. Once the vegetables have been roasted in the oven for about an hour with some lovely fresh herbs, garlic and a little olive oil, they're combined in a large bowl or serving platter, allowing the flavours to finally come together in one big happy marriage. As with any ratatouille, it tastes even better the next day, so it's an ideal make-ahead dish.


Oven Roasted Mixed Vegetable Ratatouille
Serves 8

1 medium eggplant, cut into cubes - about 4 cups
2 medium zucchini, cut into 3/4-inch dice
2 bell peppers, red and yellow, de-seeded and diced
2 cups cherry tomatoes, halved
4 cloves garlic, minced
2 sprigs rosemary
2 sprigs thyme
2 tbsp olive oil, divided
1/2 tsp salt
1/4 tsp ground black pepper


Position racks in the top and bottom thirds of the oven and heat the oven to 400°F. Line two large rimmed baking sheets with parchment. In a large bowl, toss the eggplant, peppers, tomatoes, zucchini, garlic, olive oil, rosemary, salt and pepper. Spread the vegetables evenly over both sheets. Roast, stirring the vegetables a few times, until the vegetables are slightly collapsed or shrivelled, starting to brown, and very tender, about 60-80 minutes. If the vegetables look like they may burn, turn down the heat or pile them closer together. If they look dry, drizzle on a little more olive oil. Using a slotted spatula, spoon all of the vegetables and any juices into a serving bowl. Serve warm or at room temperature.


Tuesday, March 29, 2016

Watermelon & Feta Salad with Cucumber and Basil


This vibrant Watermelon & Feta Salad is as refreshing as it is nutritious. For the prettiest presentation, small grape tomatoes of various colours and shapes add a lot of panache, and the salty sweet combination of watermelon and feta is exquisite. However, the intervening moments between mixing and serving the ingredients is when the magic happens. The juicy crispness of the watermelon turns sweeter, its flavour amplified by the salty feta combined with crunchy cucumbers, sweet grape tomatoes, salty black olives and fragrant mint and basil, finished with a drizzle of rich balsamic vinegar and extra virgin olive oil. One of my favourite summer salads, it's satisfying anytime of the year. Feta works brilliantly in this delicious salad, however it could also be made with tangy Silton, Roquefort or St Agur also, for added complexity.


Watermelon Feta Salad with Cucumber, Basil, Mint & Tomato
Serves 4

2 1/2 cups cubed seedless watermelon
2 cups cherry or grape tomatoes, cut in half
8 oz feta cheese, crumbled or cut into cubes
1/2 english cucumber, peeled, seeded and cut into cubes
1/4 cup fresh basil and mint leaves, washed and left whole
2 tbsp extra virgin olive oil
2 tbsp balsamic or sherry vinegar
Maldon salt and freshly ground black pepper to taste
1/2 cup black olives, pitted


Combine watermelon, tomatoes, feta cheese and cucumber in a large bowl. Drizzle with the extra virgin olive oil and balsamic vinegar, then sprinkle with the fresh herbs, salt and pepper. Toss the salad gently using your hands to prevent the watermelon from breaking into small pieces. Don't refrigerate and serve immediately within half an hour or so.


Monday, March 28, 2016

Wild Rice & Barley Salad with Dried Cranberries


With its delicate nutty flavour and sturdy texture, wild rice makes a delicious basis for this healthy high-fibre Wild Rice & Barley Salad. The addition of chickpeas, sliced green onions and toasted pine nuts tossed together with a tangy vinaigrette makes this salad a nutritional powerhouse. Mixed-grain salads deliver a great combination of flavours and textures as well as folate and vitamin E for a strong and healthy heart — very important for those cardio workouts. Adding beans to grains also creates the key combination of protein and carbs that helps muscles repair and refuel themselves, which makes this Wild Rice & Barley Salad with chickpeas and dried cranberries a nutritional powerhouse with heart-healthy goodness that's also rich with great flavour.


Wild Rice, Barley & Dried Cranberry Salad
Serves 6-8

1 3/4 cups chicken broth 
1/2 cup uncooked brown and wild rice mix
1/2 cup uncooked pearl barley
3/4 cup canned chickpeas, rinsed and drained 
1/3 cup golden raisins 
1/4 cup sliced green onions 
2 tbsp red wine vinegar 
1 1/2 tsp extra virgin olive oil 
1 tsp Dijon mustard 
1/4 tsp salt 
1/4 tsp freshly ground black pepper
2 tbsp chopped fresh basil
2 tbsp pine nuts, toasted
1/4 cup dried cranberries

Place the chicken broth, rice and barley in a medium saucepan, and bring to a boil. Cover, reduce heat, and simmer 40 minutes or until liquid is absorbed. Remove from heat, and let stand, covered for 5 minutes. Spoon rice mixture into a medium bowl. Add the chickpeas, raisins, green onions and cranberries. Combine the vinegar, olive oil, mustard, salt and pepper in a small bowl, and stir with a whisk. Pour over barley mixture and toss well. Cover and chill for two. Stir in the basil and pine nuts and serve at room temperature.


Friday, March 25, 2016

Indian Street Food: Hemant Bhagwani's New Amaya


Chef and restaurateur Hemant Bhagwani has played a pivotal role in shaping Toronto's perspective on Indian food since launching Amaya in 2007. This past autumn, the charismatic owner of the Amaya group of restaurants turned his beloved fine-dining flagship Amaya Indian Room into Indian Street Food Co., Bhagwani's tribute to India’s vibrant street food culture. An afternoon of eating street snacks from newspaper cones at the Dehi railway station convinced him that his next project had to connect with street food. “It took me back to my childhood. Eating aloo tikki, chicken nantha roti on newspapers on the street. I wanted to bring that experience into a restaurant. After Amaya, I wanted to take Indian food to the next level. It’s about street food for me now." Wanting to keep the original Bayview location, Bhagwani transformed Amaya’s elegant and sophisticated dining room into a much more animated space with colourful silk tablecloths, framed photographs depicting Indian life from Bollywood to food vendors and famous sites across India, plus two handsome street-vendor carts made specially made for the restaurant in Delhi. 

Bhagwani oversees the menu, recipes and presentation at Indian Street Food but has a number of chefs that help in key areas: Kamleshwar Prasad is executive chef and in charge of currys; Sudhan Natarajan takes care of the street food dishes; Devender Singh heads the tandoor; Prem Singh on the range and Sheikh Anwarruddin in charge of desserts. The menu has two tasting menu options with shareable appetizers and moves on to an impressive thali, plus of course the extensive à la carte menu of delectable dishes from Lasooni Cauliflower, Baigan Eggplant Frites and Spicy Lamb Chops to sumptuous Butter Chicken and Coastal Prawn Curries to silky Saag Paneer and ultra-creamy Black Lentil Daal Makhani. At the end of the meal, the bill is presented on a charming antique typewriter — one of three that Hemant brought back from India, but make note, Bhagwani has a 'no tip policy' at the restaurant — the first restaurateur in Toronto to institute this policy. "ISFC pays its employees a fair wage and they all share in the profits, so no tipping, please," he insists. With a fabulous new menu, warm and friendly well-paid staff and excellent food, Bhagwani's Indian Street Food is absolutely superb from start to finish.


The new interior of Indian Street Food on Bayview

The creative cocktail menu

Hemant Bhagwani doubled as bartender and host the evening we were at his newest restaurant, Indian Street Food Co.

The cocktail menu features a mix of cocktails named after the legendary kings of India, 
such as the 'Nizam' made with gin, orange syrup, lemon juice, fresh turmeric and Indian tonic water and garnished with sliced lime

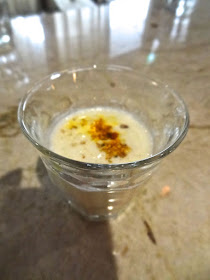
Lassi with turmeric, pistachios and cumin seed 

The Indian Street Food Company cocktail and dinner menu

Baigan frites, made with Japanese eggplant, served with chutney and a mustard yoghurt dip
was served compliments of the chef 

'Lasooni Cauliflower' - hot and sweet fried cauliflower garnished with sesame seeds

'Chor Bazaar Ka Tikka' - Chicken tikka inspired by a street vendor that Bhagwani met while visiting Delhi’s Chor Bazaar

Spicy Lamb Chops cooked with warm spices, charred to medium colour and in a Lucknawi marinade, fenugreek and mint sauce

An impressive Thali is the main entrée of the tasting menu after a series of appetizers

Flaky Paratha, Premium Basmati Rice and Papadams are served in the centre of the Thali testing menu 

Kachumber Salad with chopped cucumbers, tomatoes, onions and crunchy puffed rice 

Raita

'Saag Paneer' - Curried spinach with amaya fresh paneer fritter, watermelon radish and pickled carrot

'House Black Daal Makhani '- creamy black lentils simmered 24 hours on a tandoor

'Butter Chicken' - Not your usual butter chicken - this is a classic recipe from a street vendor from the walled city in Delhi, and garnished with toasted melon seeds

Kerala Fish Curry doused in buttery smooth tamatar masala curry sauce

Halwa for dessert

Chai Tea

The bill arrives in an old typewriter that Hemant Bhagwan picked up in India while looking for interesting finishings for his new restaurant


Keralan Chili Beef
Serves 4
Recipe courtesy chef de cuisine Sudan Natarajan, Indian Street Food

1 tsp Kashmiri chili powder or mild paprika
1 tsp table salt
2 tbsp garlic paste
1 tbsp ginger paste
5 curry leaves, roughly torn
3 tbsp coconut vinegar or malt vinegar
1 lb flank steak, thinly sliced into bite-sized strips
1/2 tsp black peppercorns
1-1/2 tbsp fennel seeds
1/2 tsp ground cinnamon or a cinnamon stick
6 whole cloves
5 green cardamom pods
For the cooking process
3 tbsp vegetable oil
2 bird’s eye chilies, slit lengthways
1 medium red onion, thinly sliced into rings
2 tsp tamarind paste
2 tbsp unsweetened desiccated coconut
1/4 cup fresh finely chopped cilantro, for garnish
15 fresh curry leaves, for garnish
4 naan flatbread


In a large bowl, whisk together the chili powder, salt, garlic and ginger pastes, torn curry leaves and vinegar. Add the beef strips and stir, coating every strip and set aside. Using a small grinder, pulverize the peppercorns, fennel seeds, cinnamon, cloves and cardamom until it makes a fine powder. Add it to the beef and toss until evenly coated. Cover the bowl tightly with plastic wrap and let marinate for at least two hours or overnight.

When ready to cook, in a large wok or non-stick pan over medium heat, sauté the marinated beef without oil for 30 to 35 minutes, allowing juices to cook out and beef to slightly dry out and caramelize. Remove from heat and set aside in a separate bowl. Wipe clean the same wok or pan with a moist towel and heat oil over medium heat. Add sliced chilies and onion, stirring occasionally until onions soften and begin to brown, 8 to 10 minutes.

Add beef and fry for 2 to 3 minutes, stirring frequently until beef is hot. Add tamarind paste and coconut, stirring to ensure paste melts and there are no clumps, about 2 minutes. Transfer to a serving plate and garnish with cilantro and fresh curry leaves. Serve immediately with toasted naan.


Thursday, March 24, 2016

Chicken Marsala with Mushroom Cream Sauce


Chicken Marsala is an Italian dish made from chicken, mushrooms and Marsala wine. The chicken is traditionally pounded into cutlets, coated in flour, briefly sautéed, and then removed from the pan, which is then used to make a Marsala reduction sauce. I prefer to use bone-in chicken breasts with the skin on, and roasted whole in the oven until they are crisp and golden brown. Brushing the breasts with oil and seasoning with black pepper, paprika and a liberal dose of kosher salt ensures a perfect crisp outer skin. Just before the breasts have finished roasting, the Marsala Mushroom Cream Sauce is prepared by sautéeing the mushrooms in a little butter and olive oil until they become soft and fragrant. Some marsala wine or dry sherry is then added and cooked for about 5 minutes until the mixture reduces slightly. Cream and fresh thyme are then stirred and cooked over a reduced heat for another 6 to 8 minutes. Thick, creamy and absolutely swimming with mushrooms, the sauce is poured over the chicken breasts, that have been arranged on a warm platter, and garnished with a tangle of fresh thyme. Served with sautéed new potatoes and a spinach or vegetable gratin, this is an easy and delicious recipe that's perfect on any chilly evening.


Chicken Marsala with Mushroom Cream Sauce
Serves 4

4 chicken breasts, bone-in and skin-on
2 tbsp vegetable oil
2 tbsp kosher salt
1 tsp black pepper
1 tsp paprika

Marsala Mushroom Cream Sauce:
2 tbsp butter
2 tbsp vegetable oil
1 lb sliced crimini mushrooms, thinly sliced
3/4 cup Marsala or Sherry
1/2 cup whipping cream
2 tbsp fresh thyme leaves, plus whole sprigs for garnish
salt and pepper


Preheat oven to 400°F. Coat the chicken breasts with vegetable oil and set on a foil lined baking pan. Season with fresh ground black pepper, paprika and a generous sprinkle of kosher salt — the more salt, the crisper the skin. Roast the chicken breasts for 35-45 minutes, depending on the size of the breasts, until they are crisp and golden brown. Turn off the oven, cover the chicken with aluminium foil and begin the Marsala Cream Sauce.

Heat the butter and oil in a large skillet over medium-high heat. Once the butter has melted, add the mushrooms and sauté for 3 to 4 minutes, until the mushrooms are barely cooked through. Add the Marsala or Sherry and cook for 5 minutes allowing the wine to slightly reduce. Stir in the heavy cream and thyme leaves, reduce the heat to medium and cook the mushroom sauce for 6-8 minutes, stirring occasionally.

Remove the chicken breasts from the oven and arrange on a warm serving platter. Spoon the Marsala Mushroom Cream Sauce over top, and garnish with fresh sprigs of thyme.


Wednesday, March 23, 2016

Pearl Harbourfront: A Haven for Dim Sum Devotées


Tucked away on the second floor of Toronto's Queen’s Quay Terminal, Pearl Harbourfront Chinese Cuisine has been tantalizing the taste buds of Toronto dumpling enthusiasts for over 30 years, and during that time, Executive Chef Gao Hui Feng has developed quite a dedicated following of Dim Sum devotées who take the escalator up to Pearl each and every weekend. Granted, the Peking Duck, Rainbow Chopped in Crystal Fold and Braised Lobster with Black Bean and Garlic Sauce are phenomenal, but what makes Pearl Harbourfront a culinary beacon for so many, is Chef Gao Hui Feng's exceptional Dim Sum, which literally means: to touch the heart. Offering a more sophisticated dining experience than many other Chinese restaurants in the city, Pearl Harbourfront is a sanctuary of casual elegance with its bright modern interior of blonde woods, cream-hued walls, crisp white linens and floor-to-ceiling windows featuring fabulous views of Lake Ontario and the Toronto Islands. Offering Dim Sum seven days a week, the restaurant features a selection of over sixty delectable dishes served in steamer baskets and small plates, from steamed and pan fried dumplings, potstickers and rice noodles to sticky rice in lotus leaf, stir fried vegetables, their ever popular Pan Fried Shrimp and Chinese Vegetable 'Hockey Puck' Dumplings and whimsical desserts such as the Lychee Jelly Goldfish studded with Chinese wolf berries!


Steamed Pork and Shrimp Siu Mai dumplings

Steamed Har Gaw Shrimp dumplings

Pan Fried Shrimp and Chinese Vegetable 'Hockey Puck' Dumplings 

Steamed Scallop dumplings

Pan Fried Chicken Gyoza dumplings

Steamed Bean Curd Rolls

Chicken Cheung Foon

Crispy Fried Shrimp Springrolls

Sticky Rice in Lotus Leaf

Deep-fried Seafood dumplings with shrimp and scallops 

Stir-Fried Long Beans with Black Bean Sauce


Tuesday, March 22, 2016

Turtle Brownie Cheesecake with Praline Sauce


"I love pecans and caramel too. I love chocolate, oh yes I do. That's why I love turtles!" This phenomenally popular Canadian television jingle from 1980 entitled "I Love Turtles" became an instant hit with its campy 1930's-styling and breathy ball gowned beauty serenaded by a chorus of kazoo players and trio of oversized tuxedo-clad turtles in top hats, white bow-ties and thin black canes. From that moment on, "Turtles" had instant caché. Turtles brand candy were developed by Johnson’s Candy Company in 1918 after a salesman came into the commissary’s dipping room and showed a candy to one of the dippers, who pointed out that the candy looked like a turtle. Soon after, the company was making the same kind of candy and selling it under the name "Turtles." Today, Turtles candies come in all sizes, shapes and recipes, some even shaped like a turtle, with contemporary mold-making techniques, but the originals were produced by candy dippers on a rectangular marble pastry board, similar in size to a modern kitchen cutting board. The original recipe, made on marble, was peanuts, caramel and various chocolates — they were a multi-task confection, requiring several sittings. This Turtle Brownie Cheesecake with Praline Sauce is infinitely less work and equally delicious that you'll soon be singing "Turtles, Turtles, rah, rah, rah..."


Turtles packaging with dapper Mr Turtle in top hat and tails

Butter, sugar and water melted over medium heat

Callebaut semi-sweet chocolate chips and Tahitian vanilla added to the melted butter and sugar

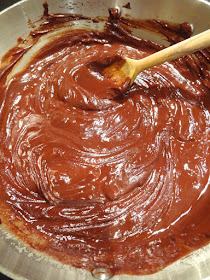
The mixture become silky smooth

Two large eggs are whisked into the mixture one at a time

Flour, baking soda and salt are added to the brownie mixture and stirred until smooth

The mixture is poured into a parchment lined springform pan and baked at 325°F for 25 minutes

Firmer around the edges and looser in the middle

Cream cheese, brown sugar, vanilla and flour blended in a standing mixture until light and fluffy

Whipping cream and four eggs are beaten into the cream cheese mixture

The cream cheese mixture is poured over the baked brownie base and set back into the 325°F oven for an hour, then with the door partially ajar, left in the oven for another hour

The cheesecake is perfectly set and ready for the ganache topping

Callabaut semi-sweet chocolate chips with whipping cream set over medium heat to create a ganache

The ganache is ready very quickly

Using an offset spatula, the ganache is smother over the cheesecake then chilled overnight

Chilled overnight, the ganache layer is firm and the cheesecake set

The praline sauce starts with butter and brown sugar melted in a saucepan over medium heat

The sauce is stirred until smooth

Whipping cream is then added to the sauce and once at a boil is simmered until it thickens

As the caramel cools slightly, the pecans are toasted in the oven for 8 minutes

The pecans are then added to complete the praline sauce

The sauce is poured over the cheesecake

The chocolate sauce is drizzled overtop of the praline sauce topped cheesecake and ready to be served!


Turtle Brownie Cheesecake
Serves 8-10
Recipe adapted from Spicy Southern Kitchen

1/2 cup butter
3/4 cup sugar
2 tbsp water
1 tsp vanilla extract
2 cups good quality semi-sweet chocolate chips, such as Callebaut
2 large eggs
3/4 cup all-purpose flour
1/2 tsp baking soda
1/2 tsp salt

Cheesecake Filling:
3 8-oz packages cream cheese, at room temperature
1 1/4 cup packed light brown sugar
2 tbsp all-purpose flour
4 large eggs
2/3 cup whipping cream
1 tsp vanilla

Ganache:
1/2 cup good quality semi-sweet chocolate chips
1/4 cup heavy whipping cream

Praline Sauce:
1 1/2 sticks unsalted butter
3/4 cup dark brown sugar
1/2 cup heavy cream
1/4 tsp salt
2 cups pecans 


Chocolate Sauce:
1/4 cup whole milk or half-and-half
1 1/2 tbsp butter, cubed
1 tbsp packed light brown sugar
2 oz semi-sweet chocolate chips
1/4 tsp vanilla extract


Preheat oven to 325°F. Line the bottom of a 9-inch springform pan with parchment paper. In a medium saucepan, heat the butter, sugar, and water over medium heat, stirring to combine, then bring to a simmer and remove from heat. Stir in the vanilla and chocolate chips until the chocolate has melted. Let the mixture cool slightly then whisk in the eggs one at a time. Combine the flour, baking soda, and salt and stir into the chocolate mixture, then pour the batter into the prepared pan. Place on a baking sheet in case there is any leakage and bake for 25 minutes, noting that the edges will be done but not the centre. Remove the pan from oven and let it cool slightly before pouring the cheesecake mixture overtop, about 5 minutes — although don't cool too much or the cake will pull away from the sides and the cheesecake mixture may seep down the sides.

To make filling, beat the cream cheese in a standing mixer fitted with a paddle attachment, until smooth and creamy. Add the brown sugar and flour and mix until fluffy. Beat in the eggs one at a time, scraping down the sides of bowl with a rubber spatula as needed. Add the whipping cream and vanilla and beat just until combined. Gently pour the cheesecake mixture on top of the brownie base which will have risen quite a bit in the oven, but the cheesecake layer will compact it down. Place the cheesecake back on the baking tray and bake in the 325°F oven for one hour. When done, turn the oven off and open the door a little bit, leaving the cheesecake in the oven for another hour. Remove the cheesecake from the oven and allow to cool to room temperature.

To make the ganache, cook the chocolate chips and heavy cream in the top of a double boiler over simmering water until smooth and warm, stirring occasionally. When the cheesecake has cooled slightly, pour the ganache on top, smoothing it with an offset spatula. Gently run a knife along the edge to loosen the cheesecake but don't remove the sides of the pan, and then cover with plastic wrap and refrigerate overnight.


For the chocolate sauce, heat the milk, butter, and brown sugar in a saucepan over medium heat until it begins to steam. Remove the pan from the heat and add the chocolate and vanilla, stirring gently until the chocolate has melted and the sauce is smooth. Cool to room temperature, then pour into a squeeze bottle and refrigerate until needed. 

Run a hot knife around the cheesecake and loosen the springform ring. Carefully remove the ring and transfer the cake to a platter, then begin to prepare the praline sauce. Preheat the oven to 350°F. In a large saucepan, combine the butter and brown sugar and cook over moderate heat, stirring, until smooth. Stir in the heavy cream and salt and bring to a boil. Simmer just until slightly thickened, about 3 minutes. Let the caramel cool, but meanwhile, spread the pecans on a rimmed baking sheet and toast for about 8 minutes, until they're lightly browned and fragrant. Transfer the warm pecans to a work surface and let them cool a few minutes, then coarsely chop and stir into the cooled caramel, and pour most of the praline sauce over the cheesecake and drizzle with chocolate sauce. Using a warm knife, cut the cake into generous slices and serve with the extra sauce for those with a sweet tooth.